What Is It?
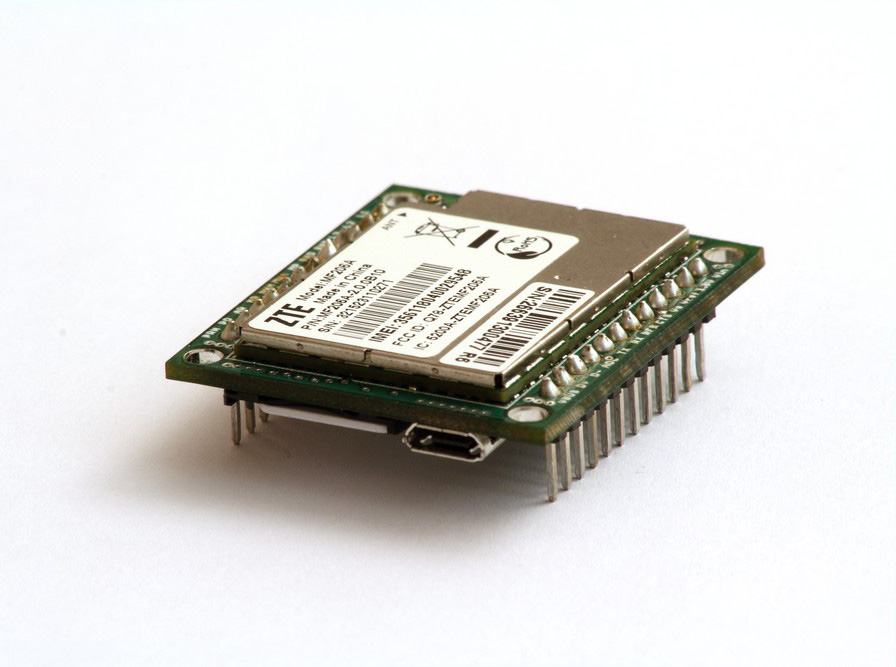
The CELLv1.0 is an easy-to-use cellular development kit. Add it to your Arduino, Raspberry Pi, or any other project you have to instantly add wireless communications capable of operating anywhere in the world!
Purchase the kit through RS Components. It includes the SparqEE CELL, a wall power supply, usb cable, antenna, and a SparqSIM – everything you need to get your device on the internet!

Super Easy to Use!
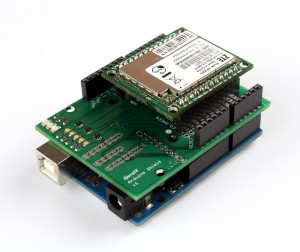
Check out the Arduino and Raspberry Pi Shields to see just how easy it is to connect the CELLv1.0 to your Arduino and Raspberry Pi!
Raspberry Pi Shield

Arduino Shield

Minimal Connections
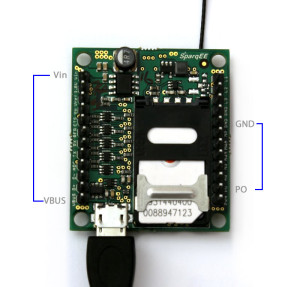
If you’re not using a shield, all you need are 4 connections – RX, TX, GND, and Vref so you can use your 3.3V or 5V system. Use the USB cable we supply for power and voilà!
The Ecosystem
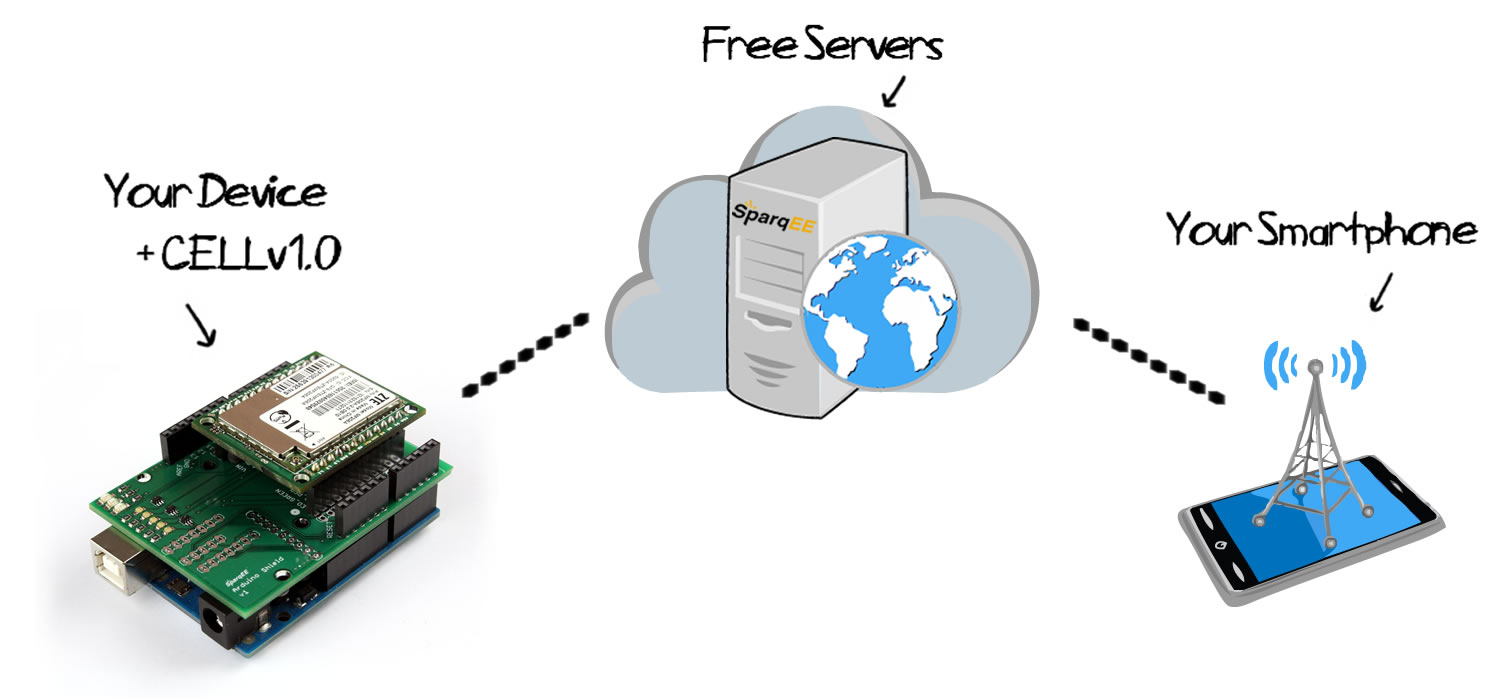
SparqEE helps you every step of the way with the CELLv1.0 to easily get your data from Your Device, through The Cloud, and back out to Your Smartphone or Computer!

SIM Card:
In order to communicate over a cellular network, you’ll also need a SIM card. SIM cards aren’t as painful as they used to be. With the CELLv1.0 you can use any SIM, here are some suggestions:
Specs
- Certifications: FCC/CE/IC
- Data (TCP/UDP)
- SMS ready
- Serial UART interface (3.3V or 5V, up to 460kbps)
- I/O (3.3 or 5V)
- USB 2.0 interface (can power the module, modem communication to module)
- Coverage: AT&T/T-Mobile in US, 3G and GSM/GPRS Worldwide
- WCDMA/HSDPA 2100/1900/900MHz
- 384Kbps, DL3.6Mbps HSDPA
- GSM/GPRS/EDGE 850/900/1800/1900MHz
- Input Voltage: 3.4-5.25V (Jumper powered from included USB cable or header pins, 4.3-5.25 regulated Vin, 3.4-4.2 if regulated)
- Current Required: <5mA standby, <75mA average working (w/o services), <500mA average working, max 2.3A
- Windows, Linux, Android drivers available from ZTE
- Weight:
- 0.50oz (with SIM)
- Size: 36x42x7mm (plugged into socket)
How To:
Here are the main steps for starting out:
- System Setup – Connecting the CELLv1.0 to your application
- SIM card – Choosing a suitable plan and activating
- Code – Communicating with the CELLv1.0 in order to transfer data over a cellular network
1. System Setup – There are 4 main ways currently to use the CELLv1.0:

Type 1 – Raspberry Pi Shield
Just power the CELLv1.0 from the USB and that’s it. Use with the RasPi code we supply.
Type 2 – Arduino Shield
Just power the CELLv1.0 from the USB and that’s it. Use with the Arduino code we supply.


Type 3 – Modem Mode
- Momentarily pull PO down to GND (A jumper wire) to turn it on
Windows
- Install the Windows driver
- Use a terminal emulator (Putty, Hyperterminal, ProComm Plus, RealTerm)
- To find the correct port, open “Control Panel -> Phone and Modem” and view the “Modems” tab for the correct COM port
Linux
- Use minicom to communicate with the modem
- “sudo minicom -b 115200 -o-D /dev/ttyUSB1”
- To find the correct port, diff “ls /dev” with and without it plugged in
- ls /dev > file1.txt
- ls /dev > file2.txt
- diff file1.txt file2.txt
Mac
- Download and install the ZTE driver. The following link worked for me
- The device was prefixed by “tty” in the “/dev” folder after installation
- We used ZTerm to talk to the modem.
Type 4 – UART Interface
- Communicate with TTL (Convert TTL to USB)
- Hardware:
- SparkFun TTL to RS232 converter (https://www.sparkfun.com/products/449)
- Keyspan USA-19HS USB to RS232
- Hardware (Other Options):
- TTL to USB converter (like an FTDI cable – you may need an external Vref depending on the cable)
- Hardware:
- Provide the converter a reference
- Jumper Vo to Vref and use that Voltage (what we use)
- Or use a power supply to provide a 3.3V or 5V reference
- Or use an Arduino or Raspberry Pi VDD
- Momentarily pull PO down to GND (A jumper wire) to turn it on
Windows/Mac
- Software Tools (we used):
- Baud rate is 115200, Parity/Data/Stop N81
- Windows: PuTTY, Hyperterminal, ProComm
- The CELLv1.0 is presented as a normal COM port under “Device Manager”.
- Mac: ZTerm
- Using our Keyspan USB device, we installed the driver, opened ZTerm, and go!
- The device was prefixed by “tty” in the “/dev” folder

2. SIM Card
- You will need a SIM card
- Must include a DATA in order to send data
- Come in the form:
- A monthly service – like typical cell phones
- Pay-as-you-go – a base plan that activates the SIM but you only pay for what you use
- Prepaid – Load the SIM with a given amount of money (say $5) and as you use the SIM, the usage is deducted from that amount
- SMS – make sure if you are sending SMSes (texts) that they are included or at least you know how much you are paying for them
- SparqSIM (SparqSIM.com) – the SIM that came with your CELLv1.0 kit
- Supplied for free so you do not have to buy it
- It must be activated and associated with a plan
- You can also get a SIM card from Target, Walmart, Frys, Radio Shack
- The SparqSIM is cheaper/easier if you are only using a small amount of data/SMS
- For example: sending/receiving tweets, updating a server with sensor data, getting time of day updates, building a tracking device, etc…
3. Code
View the “Code & Examples” section below. It provides sets of code to complete various tasks such as sending a text (SMS) and sending data to a server.
Drivers
Drivers are provided to connect to the cellular module over the USB connection. The typical usage is to connect to the SparqEE CELL via the UART using a Raspberry Pi, Arduino, Level Shifter, or any UART operating at 115200bps.
Linux Instructions (untested)
Android (untested)
*If anything is missing, please email us or post up in the forum
Code & Examples:
Basic Examples:
The CELLv1.0 must be turned on in order to use it.
Two ways to turn it on:
- The Raspberry Pi and Arduino Scripts and Libraries supply a “turnOn” function to assist
- You can also simply pull the “PO” or “Power On” pin to ground momentarily
If it’s on, one of the three main LEDs will be lit.
LED Colors:
- RED: Means the CELLv1.0 is unregistered with a cellular connections
- Green: Means the CELLv1.0 has acquired a 2G connection
- Blue: Means the CELLv1.0 has acquired a 3G connection
- Helpful Commands
COMMAND        DESCRIPTION                  RESPONSE            NOTES
at             Quick status
ate1           Enable command echo
at+zrst        Reset
at+creg?       Network Registration         +CREG: 0,5 N/A | 0=not reg,1=reg home,2=searching,3=reg denied,4=unknown,5=reg roaming
                                                                If SIM is fully activated, should be 1 or 5
at+cops=?      List available networks      +COPS: (1,"AT&T","AT&T","310410",0),
                                                                Response takes a while
at*cnti?       Current tech                 *CNTI: 0,HSDPA      0=current,1=available,2=device supported | tech
at+csq         Signal Quality               +CSQ: 12,99         rssi | ber
- SMS – send
at+cmgf=1                                    set SMS to plaintext mode
at+cmgs="+12223334444"                       set destination phone number
> hey there                                  enter message
<cntr+z>                                     send data
- SMS – receive (immediately)
at+cnmi=1,2,0,0,0                           set SMS to pass incoming directly to output
                                            -Received message in the following format:
+CMT: "+12223334444",,"14/08/25,10:25:35-28"
Message text.
                                            Date format is YY/MM/DD,HH:MM:SS+TZ
                                            (Time zone looks like it can be ignored)
- SMS – receive (memory)
at+cnmi=1,1,0,0,0                           set SMS to pass incoming directly to memory
                                            -Received message in the following format:
+CMTI: "ME", 0                              \'0\' is the memory index of the message

at+cmgr=0                                   Read message at index 0
                                            -Received message in the following format:
+CMGL: 0, "REC READ","+12223334444",,""ME","14/08/25,10:26:55-28"
Message text.
at+cmgd=0                                   Delete message at index 0
at+cmgl=4                                   Read all message

Consult the AT Commands for more options
- SMS – send
at+zipcall=1                                    start call - state 1 open
at+zipopen=1,0,23.253.146.203,9999              open port 9999 connection to the SMS gateway
at+zipsend=1                                    initiate send - socket id
SABCDWXYZ+12223334444 Hello!                    'S', USER/PASS from SparqSIM portal, Phone number, ' ', Message
                                                Credentials available under your SparqSIM account (“Services”->”Source Credentials”)
<cntr+z>                                        send data
at+zipcall=0                                    end call - state 1 close
Note: Below examples do not include response from module
- TCP example
at+zipcall=1                                 start call - state 1 open
at+zipopen=1,0,www.dbunplugged.com,9999      open connection to server (TCP) - socket id,type,IP,Port
at+zipsend=1                                 initiate send - socket id
12345                                        data to send
<cntr+z>                                     send data
at+zipcall=0                                 stop call - state 0 closed
- UDP example
at+zipcall=1                                 start call
at+zipopen=1,1,www.dbunplugged.com,9999      open connection to server (UDP) - socket id,type,IP,Port
at+zipsend=1                                 initiate send - socket id
12345                                        data to send
<cntr+z>                                     send data
at+zipcall=0                                 stop call - state 0 closed
Click the following to view the Ecosystem Code – CELLv1.0, Server, and Client:
Advanced Examples:
- TCP example
at+zipcall=1                                 start call - state 1 open
at+zipopen=1,0,www.dbunplugged.com,80        open port 80 (HTTP) connection to server
                                             socket id,type(UDP=1,TCP=0),hostname/IP,Port
at+zipsend=1                                 initiate send - socket id
>SEE QUERY BELOW                             data to send
<cntr+z>                                     send data
at+zipcall=0                                 stop call - state 0 closed

QUERY:
This example request can be tried in the address bar by entering www.dbunplugged.com/ip
The basic query to a webserver needs to include a valid HTML header.  The header consists of a minimum of two components, but it can be tricky to send the data correctly formatted. Use http://www.asciitohex.com/ to convert it for you.
-----
GET /ip HTTP/1.1
Host: www.dbunplugged.com

-----
At www.asciitohex.com, paste the above (with newlines) into the "Text" box and hit "Convert". Press the "Copy to Clipboard" button under "HTML Entities".  Paste the output to your putty session in the above example for "QUERY".

RESPONSE:(notes in blue)
-----
OK                                                     send went through

+ZIPSEND: 1, 45                                        45 characters were sent

+ZIPRECV: 1,69.163.222.81,80,586,HTTP/1.1 200 OK       ZIPRECV response
Date: Tue, 26 Aug 2014 21:07:09 GMT
Server: Apache
Set-Cookie: dbUnplugged_session=a%3A5%3A%7Bs%3A10%3A%22session_id%22%3Bs%3A32%3A%2270130bbf245d6cf6bdce33f24712949a%22%3Bs%3A10%3A%22ip_address%22%3Bs%3A13%3A%2232.141.68.249%22%3Bs%3A10%3A%22user_agent%22%3Bb%3A0%3Bs%3A13%3A%22last_activity%22%3Bi%3A1409087229%3Bs%3A9%3A%22user_data%22%3Bs%3A0%3A%22%22%3B%7D808b253b36ac75ba34a315914627915e; expires=Tue, 26-Aug-2014 23:07:09 GMT; path=/
Vary: Accept-Encoding
Transfer-Encoding: chunked
Content-Type: text/html

24
32.141.68.249<br>2014-08-26 14:07:09                   response
0
-----
BASIC – Linux (tested on Ubuntu 14.04)
Same steps as the Raspberry Pi except the script is going to be something like the following. You may have to change some parameters as noted:
sudo ./sakis3g connect --nostorage --pppd APN="Internetd.gdsp" APN_USER="user" APN_PASS="pass" USBINTERFACE="1" USBDRIVER="option" OTHER="USBMODEM" USBMODEM="19d2:0117"

    OPTION               NOTE
    APN                  Should be the APN from your particular provider (typically on the SIM card package)
    APN_USER             Same as APN, but for username.  If none, leave as-is
    APN_PASS             Same as APN, but for password.  If none, leave as-is
    USBINTERFACE         The 'X' digit(s) following the USB modem from /dev/ttyUSBX
    USBMODEM             USB Modem MAC addr from "lsusb" (when the modem is on), ex: 19d2:0117

If everything goes well, you should be presented with something like:
"MF206A connected to DATA ONLY (310410)."
This means it's connected!!!
View all information we have on Sakis3g on the Raspberry Pi Page
Troubleshooting:
Using minicom, see what the SIM card reports for the command

    at+cgdcont=?

With the SparqSIM SIM card, it should include "Internetd.gdsp" and look something like this:

    +CGDCONT: 1,"IP","Internetd.gdsp","0.0.0.0",0,0

If the APN isn't correct, then enter the following and try again:

    at+cgdcont=1,"IP","Internetd.gdsp"
Shield Examples – Raspberry Pi:
Click the following to view the Raspberry Pi Code:
Shield Examples – Arduino:
Click the following to view the Arduino Code:


